How to Build a PC: Step-by-Step Guide for Beginners
Mia Anderson
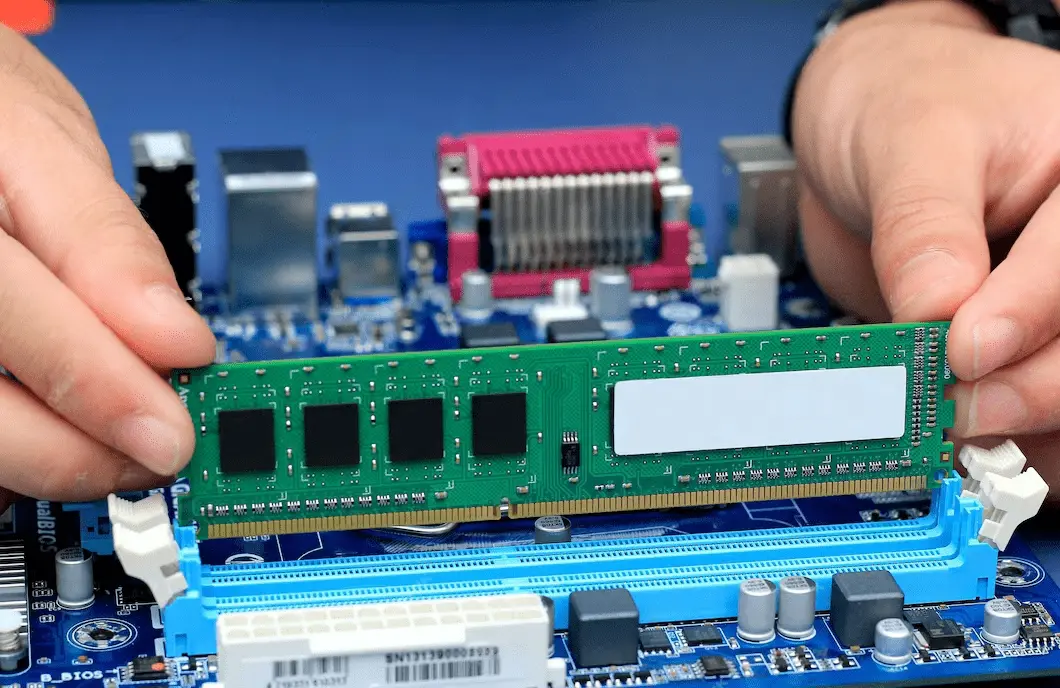
Photo: How to Build a PC: Step-by-Step Guide for Beginners
Building your own PC might seem like a daunting task, especially if you’re a beginner. But with the right guidance, it’s an incredibly rewarding experience. Not only do you get the satisfaction of creating something with your own hands, but you also gain a deeper understanding of how computers work. Whether you’re looking to build a gaming rig, a high-performance workstation, or just a budget-friendly machine, this guide will walk you through every step of the process.
Why Build Your Own PC?
Building your own PC has several advantages over buying a pre-built system. First and foremost, it gives you complete control over the components, allowing you to choose the best parts that fit your needs and budget. Additionally, a custom-built PC is often more cost-effective in the long run, as you can upgrade individual components as needed, rather than replacing the entire system. Finally, the knowledge you gain from building your own PC is invaluable. Understanding how each component works and how they interact with one another is essential for troubleshooting and upgrading in the future.
Understanding the Basics
Before diving into the building process, it’s crucial to understand the basic components of a PC and their functions. Here’s a quick overview:
Central Processing Unit (CPU)
The CPU, often referred to as the brain of the computer, handles most of the processing tasks. When choosing a CPU, consider what you’ll be using your PC for. For gaming or high-performance tasks, you’ll want a powerful processor like an Intel Core i7 or AMD Ryzen 7. For basic tasks, a more affordable option like the Intel Core i3 or AMD Ryzen 3 will suffice.
Graphics Processing Unit (GPU)
If you’re building a gaming PC, the GPU is arguably the most important component. It’s responsible for rendering images, videos, and animations. Popular choices include the NVIDIA GeForce and AMD Radeon series. For a budget build, consider GPUs like the NVIDIA GTX 1660 or AMD RX 580, while high-end builds might feature the NVIDIA RTX 3080 or AMD RX 6800 XT.
Memory (RAM)
RAM, or Random Access Memory, is crucial for multitasking. For most users, 16GB of RAM is sufficient, but gamers and content creators may benefit from 32GB or more. When choosing RAM, look for high-speed options (measured in MHz) that are compatible with your motherboard.
Storage
When it comes to storage, you have two main options: Hard Disk Drives (HDD) and Solid State Drives (SSD). SSDs are faster and more reliable but come at a higher cost per gigabyte. For most builds, a combination of a smaller SSD for your operating system and a larger HDD for additional storage is ideal.
Motherboard
The motherboard is the backbone of your PC, connecting all the components together. When selecting a motherboard, ensure it’s compatible with your CPU and has enough slots for your RAM, GPU, and any other peripherals you plan to use.
Power Supply Unit (PSU)
The PSU provides power to all your components. It’s important to choose a PSU with enough wattage to support your entire system. Additionally, look for PSUs with an 80 Plus rating, which indicates efficiency.
Case
Your case houses all your components and can impact airflow, cooling, and even aesthetics. Cases come in various sizes, so choose one that fits your motherboard (ATX, Micro-ATX, Mini-ITX) and has room for your components and cooling solutions.
Step-by-Step Guide to Building a PC
Now that you understand the basic components, it’s time to start building. Here’s a step-by-step guide to help you through the process.
Step 1: Gather Your Tools and Components
Before you start, make sure you have all the necessary tools and components. At a minimum, you’ll need a Phillips-head screwdriver, anti-static wrist strap, and a clean, flat workspace. It’s also a good idea to have a small container for screws and other small parts.
Step 2: Install the CPU
Begin by installing the CPU onto the motherboard. Carefully open the CPU socket on the motherboard and align the notches on the CPU with the socket. Gently place the CPU into the socket, and secure it by closing the latch. Be careful not to force the CPU, as the pins are delicate and can easily be damaged.
Step 3: Install the RAM
Next, install the RAM modules. Locate the RAM slots on your motherboard, and open the latches on either side. Align the notch on the RAM module with the slot, and press down firmly until the latches click into place. If you’re installing multiple RAM modules, consult your motherboard’s manual to ensure they’re installed in the correct slots for optimal performance.
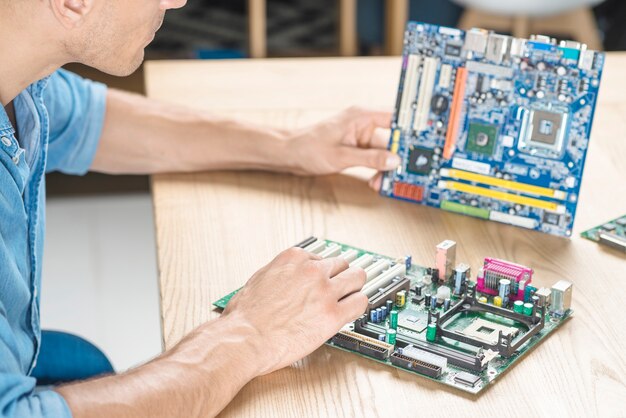
Step 4: Mount the Motherboard
Once the CPU and RAM are installed, it’s time to mount the motherboard into the case. First, install the I/O shield (a metal plate that covers the rear ports) into the case. Then, carefully lower the motherboard into the case, aligning it with the standoffs (raised screw mounts). Secure the motherboard with screws, ensuring it’s firmly in place but not over-tightened.
Step 5: Install the GPU
If you’re using a dedicated GPU, now’s the time to install it. Locate the PCIe slot on your motherboard (usually the topmost slot) and remove the corresponding metal covers from the case. Align the GPU with the slot and press down until it clicks into place. Secure the GPU with screws, and connect the necessary power cables from the PSU.
Step 6: Connect Storage Devices
Install your SSD or HDD into the appropriate bays in the case. For SSDs, you may need to use an adapter or mounting bracket. Once the storage devices are secured, connect them to the motherboard using SATA cables, and connect the power cables from the PSU.
Step 7: Connect the Power Supply
Install the PSU into the case, usually at the bottom. Secure it with screws, and connect the power cables to the motherboard, GPU, storage devices, and any other components. Ensure that all connections are secure and that you’ve used the appropriate cables for each component.
Step 8: Install Cooling Solutions
Proper cooling is essential for maintaining optimal performance and preventing overheating. If you’re using an aftermarket CPU cooler, install it now, following the manufacturer’s instructions. You may also want to install additional case fans or liquid cooling solutions, depending on your build.
Step 9: Connect the Case Cables
Finally, connect the case cables for the power button, reset button, USB ports, and audio jacks. These cables are usually labeled, and the corresponding headers on the motherboard should be clearly marked. Refer to your motherboard’s manual if you’re unsure of where to connect each cable.
Step 10: Test and Boot
Before closing up your case, it’s a good idea to test your build. Connect your monitor, keyboard, and mouse, and power on the system. If everything is connected correctly, you should see the motherboard’s BIOS screen. If not, double-check your connections and make sure all components are seated properly.
Common Mistakes to Avoid
Building a PC is a rewarding experience, but it’s easy to make mistakes if you’re not careful. Here are some common pitfalls to watch out for:
Overlooking Compatibility
One of the most common mistakes is choosing incompatible components. Always double-check that your CPU, motherboard, RAM, and GPU are compatible with one another. Additionally, make sure your PSU has enough wattage to power your entire system.
Ignoring Cable Management
Good cable management is essential for airflow and aesthetics. Take the time to route cables neatly, using zip ties or Velcro straps to keep them in place. Not only will this improve airflow, but it will also make future upgrades and maintenance easier.
Forgetting Thermal Paste
When installing the CPU cooler, don’t forget to apply thermal paste between the CPU and the cooler. This paste helps transfer heat from the CPU to the cooler, preventing overheating. Most aftermarket coolers come with thermal paste pre-applied, but if you’re using a stock cooler or reusing a cooler, you’ll need to apply your own.
Conclusion
Building your own PC is a fulfilling journey that not only provides you with a powerful machine tailored to your needs but also equips you with valuable knowledge. Whether you’re a gamer, a content creator, or just someone looking to learn more about computers, the skills you gain from building a PC are invaluable. Remember, patience and attention to detail are key. By following this guide, you’re well on your way to assembling a PC that will serve you well for years to come.


Recommended✨
Marketing
View All
January 27, 2025
PPC vs SEO: Digital Marketing ShowdownDiscover the differences between PPC and SEO in digital marketing. Find out which strategy is right for your goals and budget. Make an informed choice today!
Mia Anderson

January 18, 2025
Top 10 Digital Marketing Trends for 2024Discover the must-know digital marketing trends for 2024. Stay ahead of the curve and elevate your strategies with these insights! Read more now!
Mia Anderson

January 23, 2025
Social Media in Digital Marketing 2024Learn how social media is revolutionizing digital marketing in 2024. Boost your brand with actionable tips for viral campaigns!
Mia Anderson


Entertainment
View All
Discover how narrative design transforms video games into immersive experiences. Learn industry secrets and start creating unforgettable stories today!
Mia Anderson

Discover top tips on streaming your favorite films legally & safely with our guide - click now, don't miss out!
Mia Anderson

Discover the top tips to jumpstart your acting career in 2024. Learn key strategies and actionable steps. Start your journey today don’t wait!
Mia Anderson

Discover the latest online movie distribution trends driving success in 2024. Stay ahead with expert insights click now to revolutionize your strategy!
Mia Anderson
Automotive
View All
Learn how fast-charging networks are revolutionizing EV adoption by enhancing convenience and reducing charging times.
Read More
Discover the rapid growth of electric vehicle models in the global market. Learn which brands are leading the way in 2024.
Read More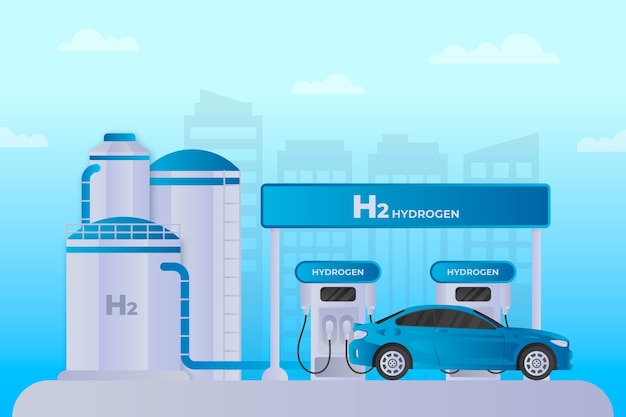
Compare hydrogen fuel cells and battery EVs to uncover which technology is shaping the future of sustainable transportation.
Read MorePolular🔥
View All
1
2
3
4
5
6
7
9
10
Technology
View All
December 9, 2024
The Best Noise-Canceling Headphones for Travel in 2024
Travel in peace with the ultimate noise-canceling headphones! Our guide helps you choose the perfect pair. Click to discover and enjoy a quiet journey.

September 17, 2024
5G Technology: Key Updates and Innovations for 2024
Explore the latest advancements in 5G technology, including 5G-Advanced and IoT innovations. Stay informed on 2024 trends and their impact—read more now!

August 9, 2024
The Best Video Game Graphics in 2024
Find out which video games from 2024 provide the most amazing graphics and captivating gameplay. These games will wow you with their beautiful settings and minute features!
Tips & Trick